RANE FOUR
SETUP
Firmware & Drivers
Firmware: Please update the firmware of the device to the latest available version at Rane DJ Downloads
Drivers: For both Windows and MacOS X computers Install the latest drivers (Control Panel) from Rane Dj Downloads
VirtualDJ Setup
Once VirtualDJ is launched, a Connect Window will appear. Please login with your preferred method from the ones provided.
A Pro Infinity or a Pro Subscription License is required to fully use the Rane Four.
Without any of the above Licenses, the controller will operate for 10 minutes each time you restart VirtualDJ.
Buy a license

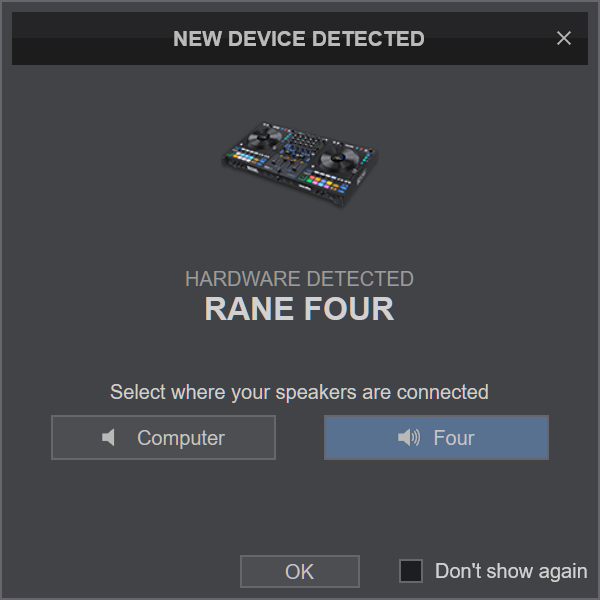
Click on the "Four" button in order VirtualDJ to apply the pre-defined audio configuration for your device.
Make sure you have the top-panel Source selectors to USB-A or USB-B depending on the USB port you connected at the rear panel.
Click to OK.
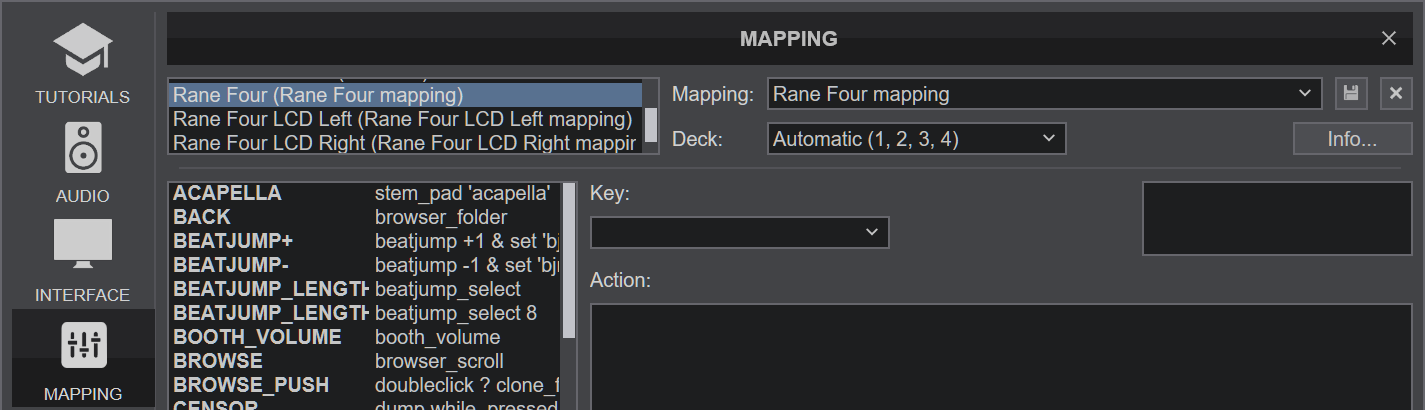
MAPPING
The unit should be visible in the MAPPINGS tab of Config and the “factory default” available/selected from the Mappings drop-down list. The factory default Mapping offers the functions described in this Manual, however those can be adjusted to your needs via VDJ Script actions.
Find more details at VDJ Pedia
AUDIO Setup
The unit has a pre-defined Audio setup and a special button in the AUDIO tab of Config to provide that.
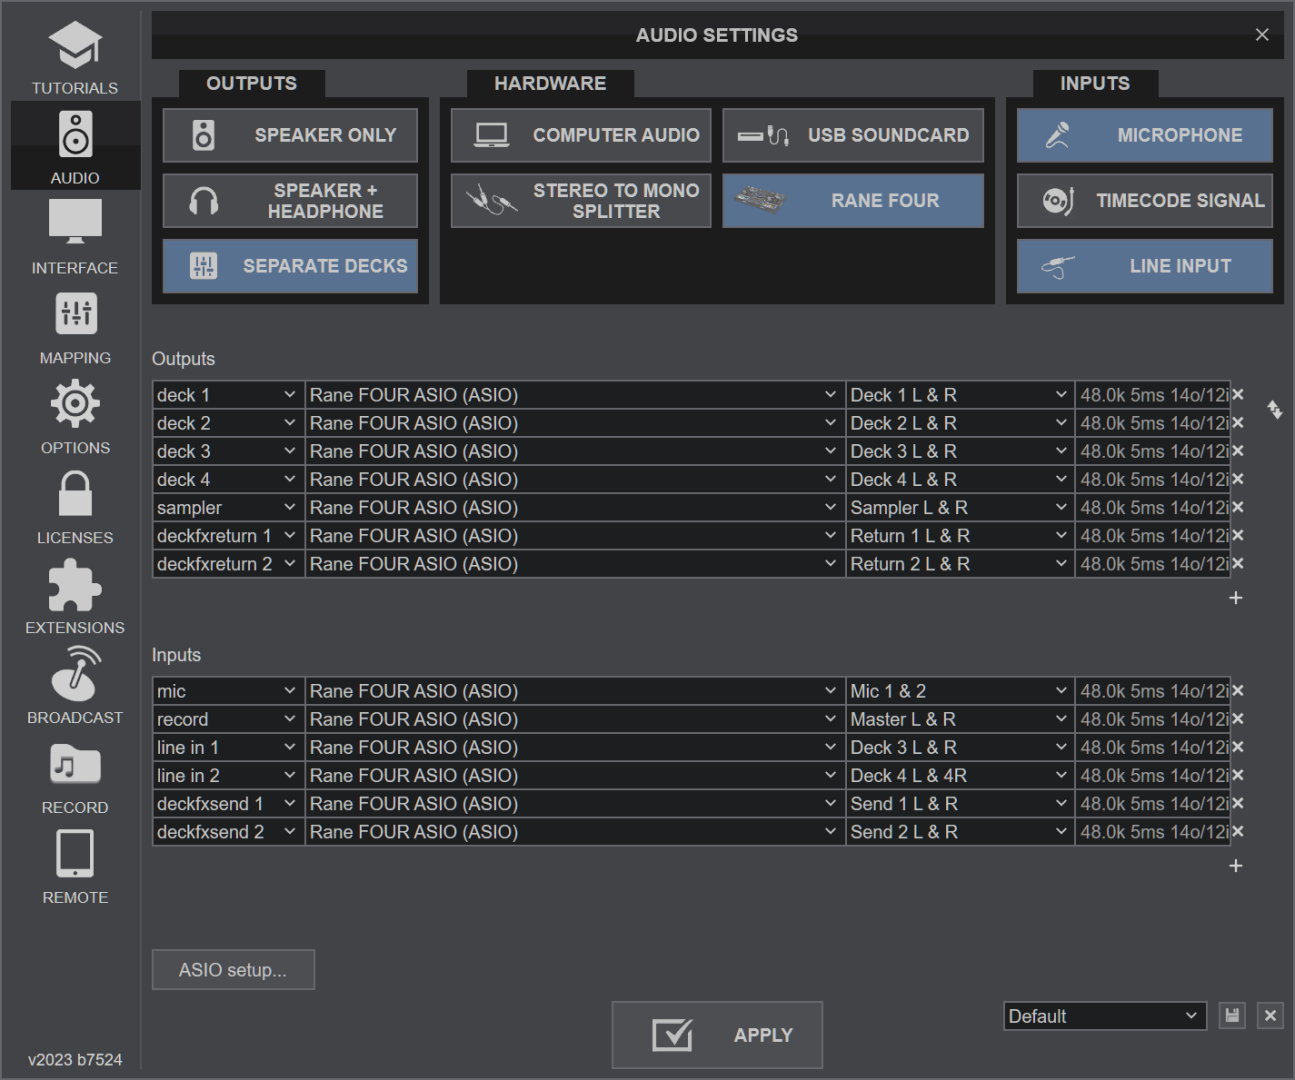
For further software settings please refer to the Manuals of VirtualDJ
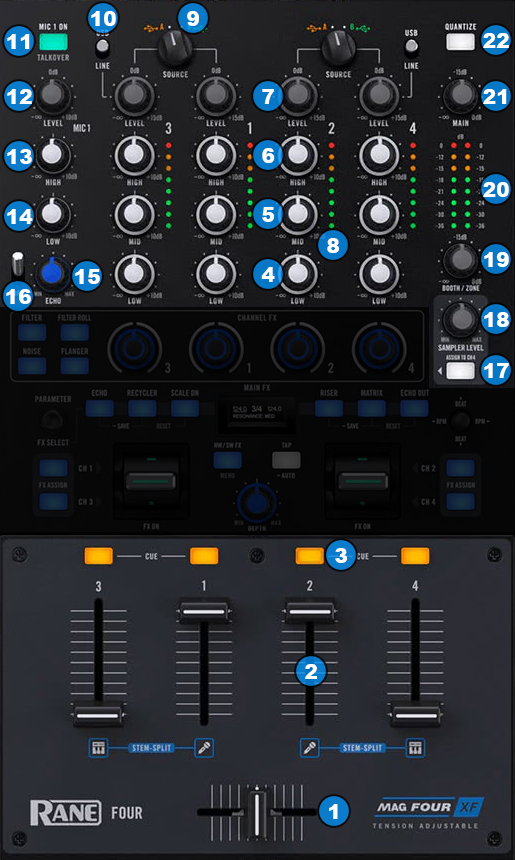
LAYOUT
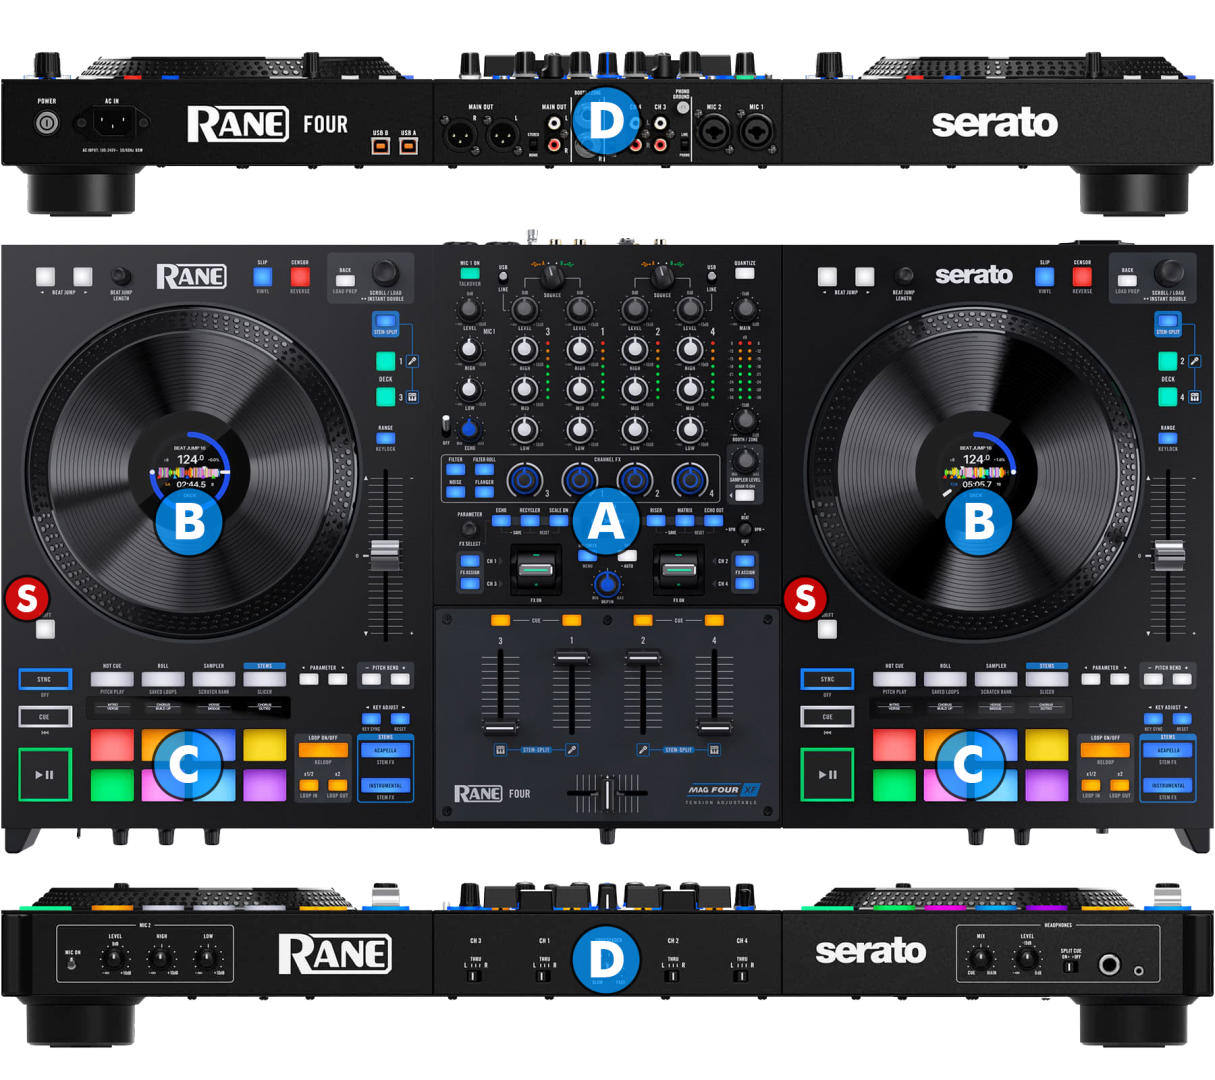
The functionality of each button, knob and slider per section (as shown in the image above) will be explained in detail in the next chapters
S SHIFT Hold this button down to access secondary functions of Rane Four as described in this manual
A MIXER & EFFECTS
B DECKS
C PADS
D FRONT & REAR
MIXER & EFFECTS
MIXER
All mixer operations described in this chapter are performed via the device hardware.
However, the movement of all basic mixer elements is still visible in the VirtualDJ GUI.
KEY
ACTION
Press multiple buttons simultaneously to send multiple Decks to Headphones at once.
Put the switchers to USB A or USB B position depending on which port you have connected your computer.
To adjust the parameters of the Echo effect please refer to Rane Four operation manual.
This knob will have no effect if the "SAMPLER TO DECK 4" function is active.
When Quantize is enabled, hotcues, loops and beatjumps will snap to the CBG of the track.
EFFECTS
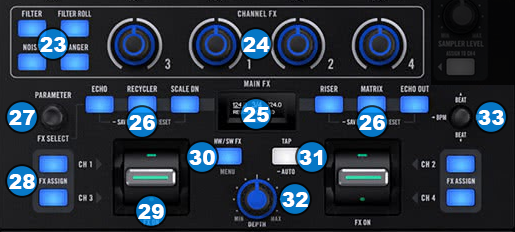
This chapter focuses on how to use Rane Four to control VirtualDJ effects.
It is not possible to use both hardware and software effects at the same time.
Quick EFFECTS operation guide:
- Press the HW/SW FW button to toggle between using hardware or software effects.
When the button is blue, hardware effects are operated. When the button is amber/orange software effects are operated. - Press one of the six MAIN FX buttons to arm an effect for execution.
In software mode you can arm multiple effect slots simultaneously. When an effect slot is armed it's led will lit brightly. - Move the JOYSTICK up or down to select the desired beats parameter for the selected effect(s). The beats parameter will be visible on main effects screen.
- Press one of the FX ASSIGN buttons to determine on which deck you're going to apply the selected effect(s).
You cannot apply an effect at both decks of the same controller side at the same time. - Adjust the DEPTH knob to adjust the strength of the selected effect(s).
- Use the FX ON paddles to activate the selected effect(s.)
Move the paddles away from you to activate the effect(s) permanently. The paddles will latch to that position.
Pull the paddles towards you to activate the effect(s) momentarily. - In order to select a different effect for a slot do the following:
- Press and hold down the MAIN FX button of the slot you want to change the effect.
- Turn the PARAMETER knob until you reach the desired effect for the slot.
- Release the MAIN FX button
KEY
ACTION
The Color Effects of Rane Four are software effects.
When the knobs are placed in the middle position, no effect is applied.
When using hardware effects only one effect can be selected (armed) at each time.
When using software effects it is possible to select multiple effects at once.
Hold one of these buttons down and rotate the PARAMETER knob in order to select a new effect for the selected effect slot.
In hardware effects mode use this knob to adjust various parameters of the selected effect.
Effects can be applied only on one deck per each controller side at the same time.
Move the paddles away from you to activate the selected effect(s) permanently. The paddles will latch to that position.
Pull the paddles towards you to activate the selected effect(s) momentarily.
When hardware effects are selected the button will turn blue.
When software effects are selected the button will turn amber/orange.
The selected deck is shown on MAIN FX SCREEN by underlying the BPM of the left or right side.
To switch between the left and right side use the JOYSTICK.
Move the joystick right or left to select which side is used for taping.
DECK CONTROLS
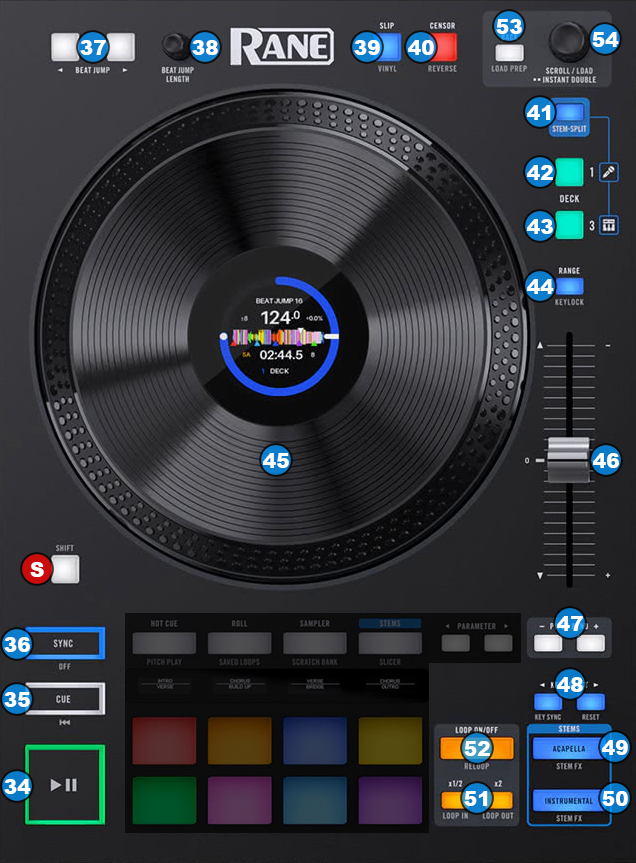
KEY
ACTION
SHIFT (SECONDARY) ACTION
Press the knob down to select 8 beats as the beatjump length.
It is possible to replace the behavior of this button to "Silent Cue" mode instead, from the Rane Four setup menu.
When in "Silent Cue" mode, press this button to mute the sound of the deck. Press it once again or use any of the hotcue pads to restore the sound.
Push once to load the selected track on a deck.
Doubleclick to load and clone the track from the other deck.
PERFORMANCE PADS
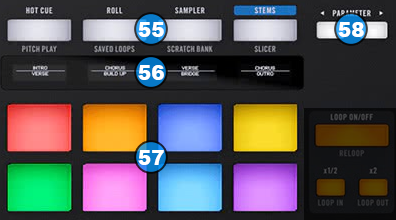
KEY
ACTION
SHIFT (SECONDARY) ACTION
The pre-defined primary modes are..
Hotcues, Loop Roll, Sampler and Stems
The pre-defined secondary modes are..
Keycue, Saved Loop, ScratchBank and Slicer
The pre-defined modes/pages can be changed to your needs. Please see How to assign Pad modes
The pre-defined tertiary modes are..
Custom, Loop, Scratch and Stems+FX
FRONT & REAR PANELS
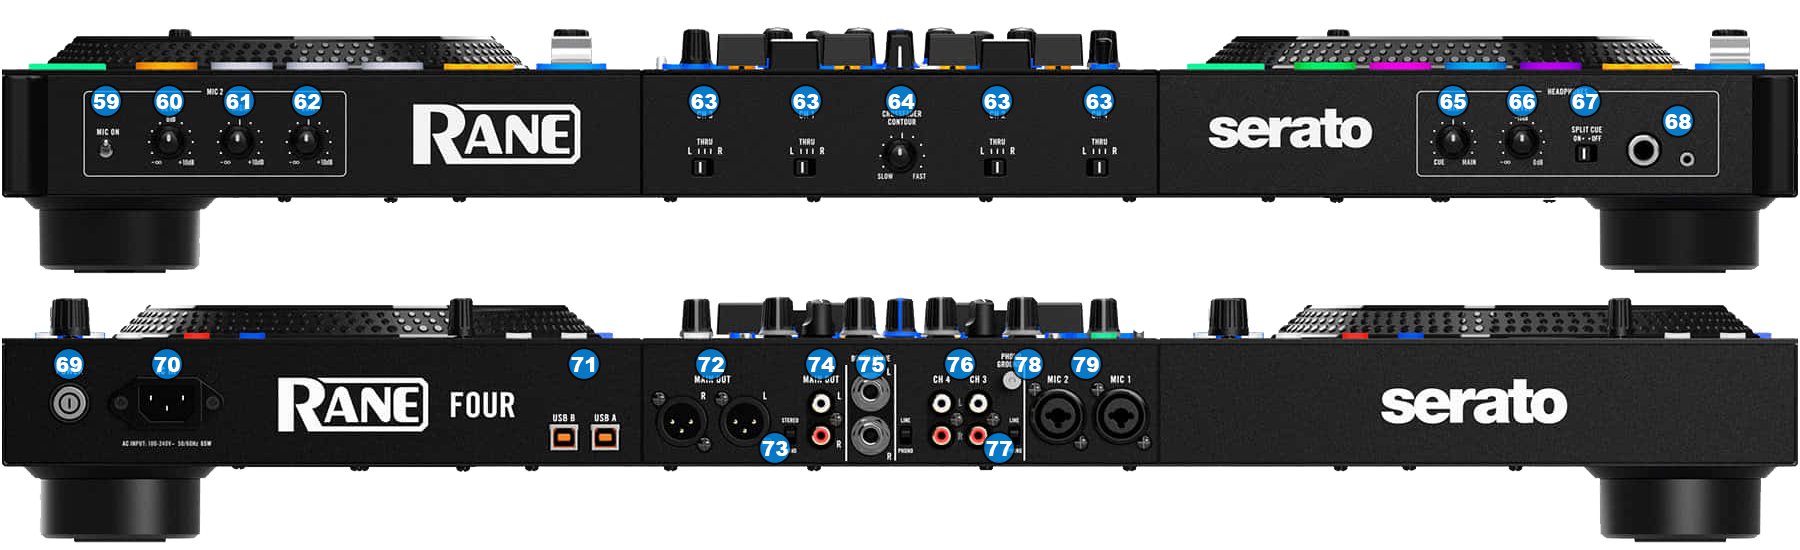
CONTROL
OPERATION
Please make sure that you have made all the necessary connections on the back of the unit before turning it's power ON.
Connect a standard IEC power cable.
You can connect up to two computers by using the two ports of the device (labeled USB A and USB B).
Make sure that you turn the SOURCE switches at the top panel to the correct USB port for software mixing.